Build your Capacitor iOS app bundle using GitHub Actions
Looking for building Android bundles with Capacitor? Check out this blog post instead!
In this post we will set up a GitHub Actions workflow for an iOS Capacitor app that will produce an IPA file, ready for upload to Apple via the Transporter app.
At a high level, we will:
- Set up certificate, identifiers and profiles
- Configure out GitHub Actions Secrets to use the above
- Create a GitHub Actions workflow
- Submit the app to the app store via the Transporter app
Let’s get started! 🤩
Setting up Certificates, Identifiers and Profiles
Compared to Android, building an iOS app will require a bit of work.
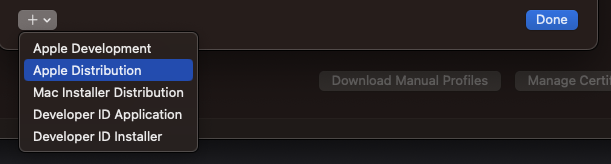
First we need to make sure that we have at least one distribution certificate. It’s easiest to do this via XCode by going to Settings > Accounts > Manage certificates > + > Apple distribution
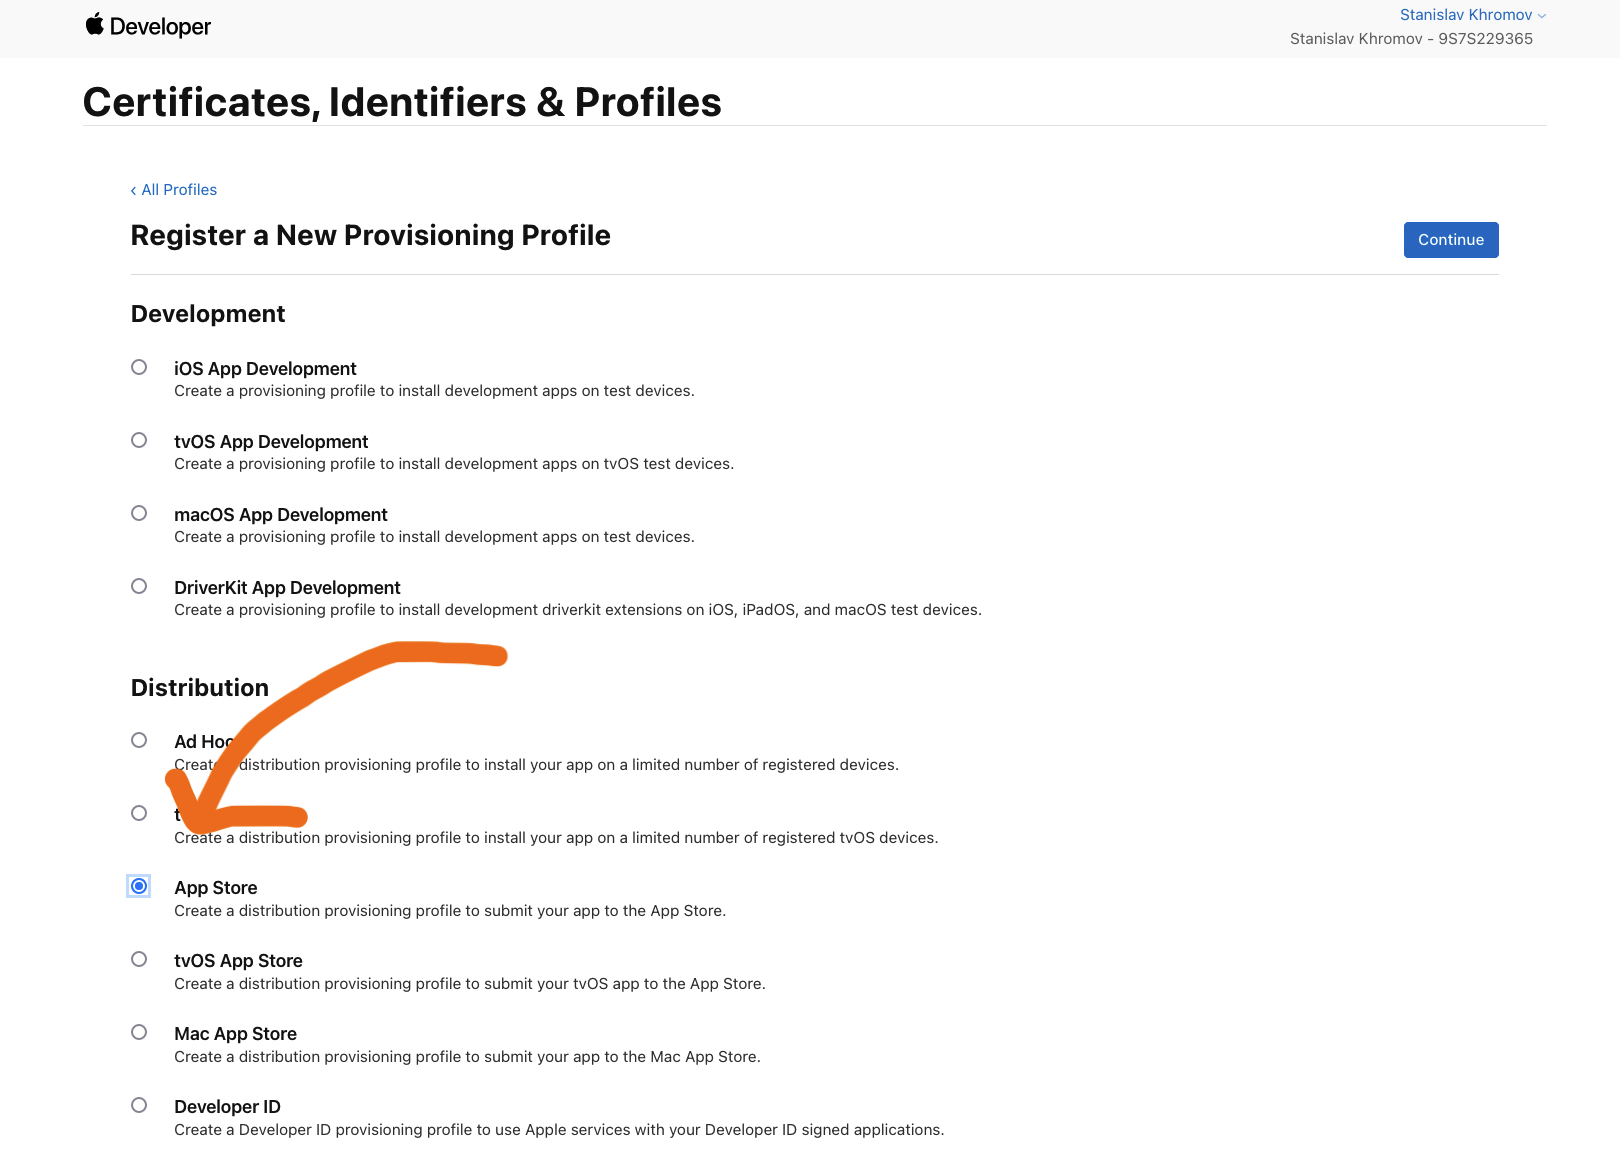
Now that we have a certificate, we need to add a profile. We can go to to the Apple Developer site for profiles and add a new App Store profile.
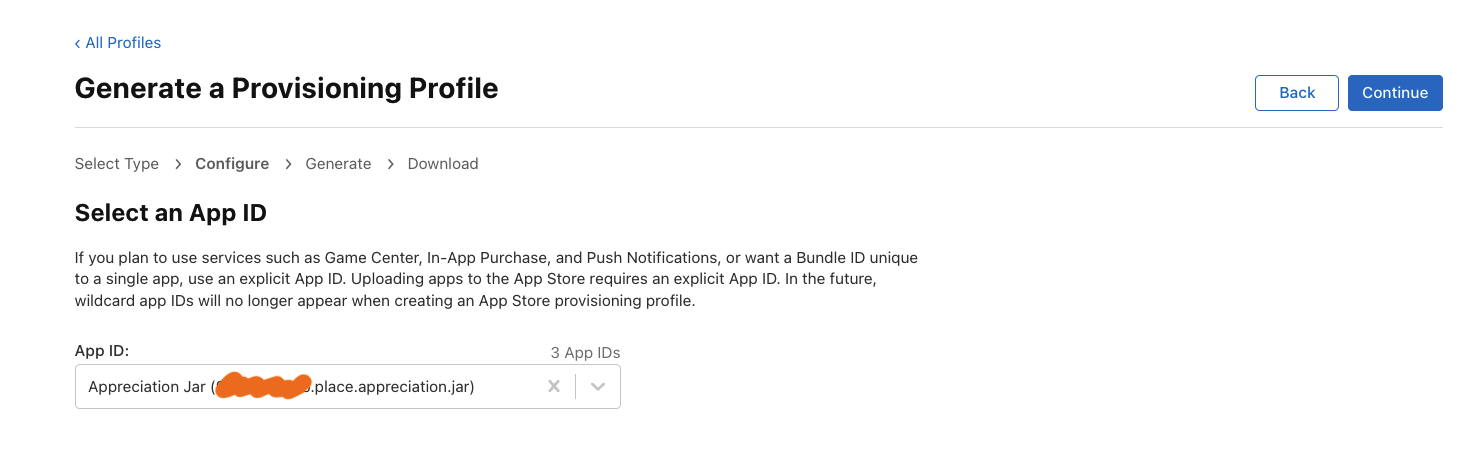
After this, you’re going to select the App Id, this should be the one specific to your app, not a wildcard one.
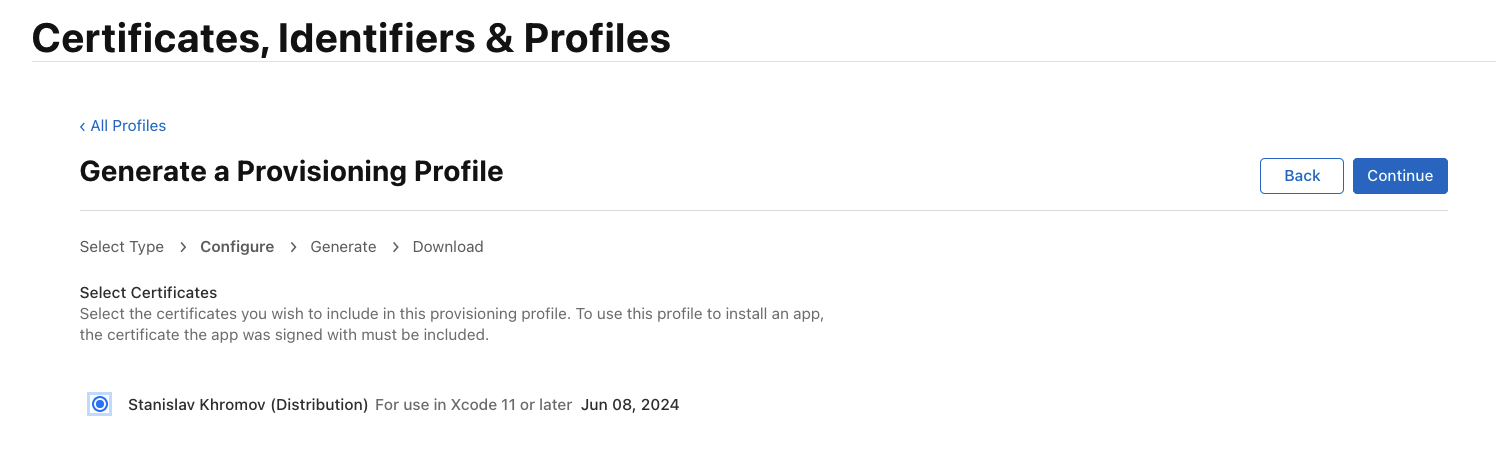
Then you select the associated certificate. Since you generated a distribution certificate from XCode in an earlier step, it should show up here.
Name your profile, and then download it, you should get a .mobileprovision file.
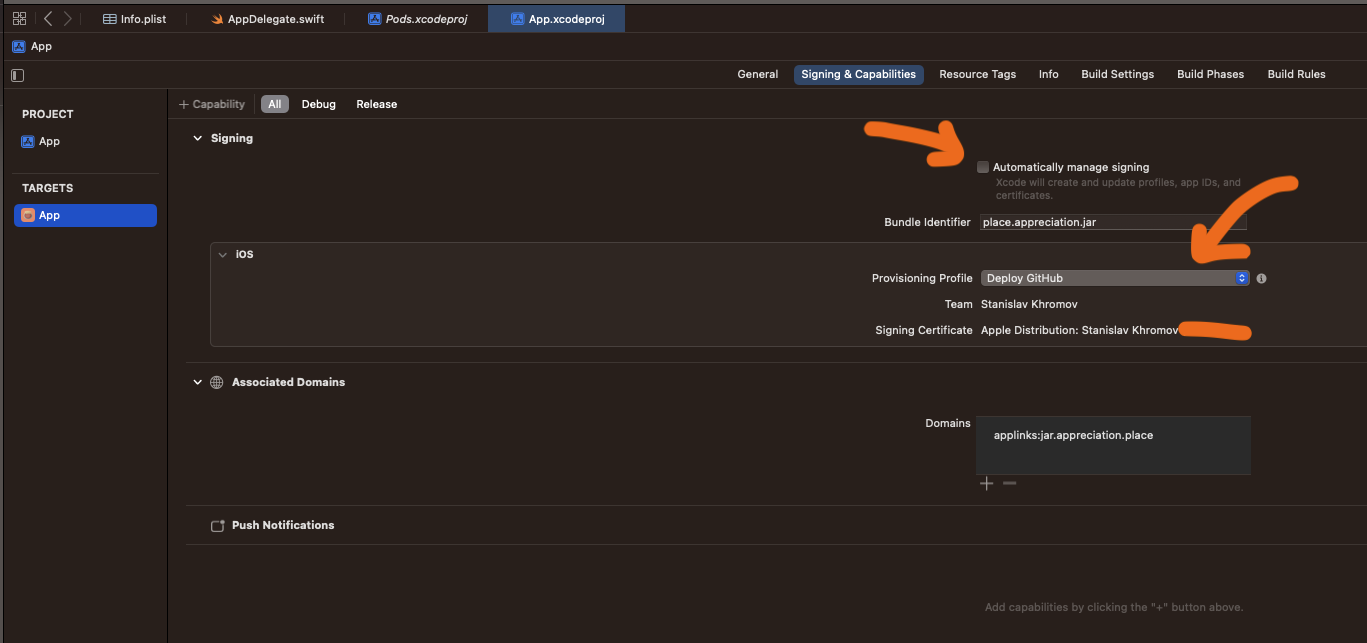
Switching your app to manual signing
In order to be able to sign your builds in CI, you need to disable “Automatically manage signing” and set the provisioning profile to be the one you created in the earlier step. After changing this setting in XCode, you will get a diff in project.pbxproj that will need to be committed to GitHub source control.
Setting up the workflow
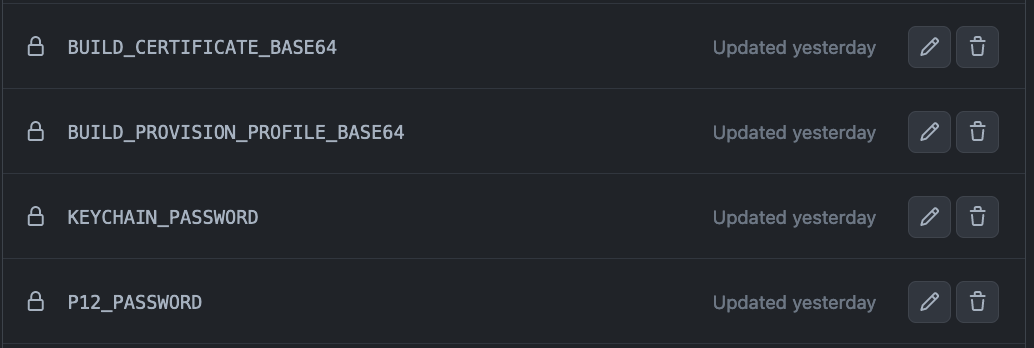
The first thing you need is to follow the official GitHub guide called Installing an Apple certificate on macOS runners for Xcode development. You don’t need to start creating the YAML file yet, but you do need to perform all the steps to have the variables BUILD_CERTIFICATE_BASE64, P12_PASSWORD, BUILD_PROVISION_PROFILE_BASE64 and KEYCHAIN_PASSWORD set in your GitHub repos secrets under Settings > Secrets and variables > Actions.
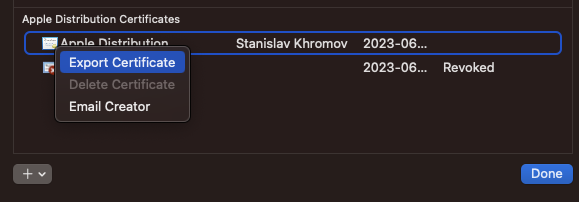
When it asks you for the BUILD_CERTIFICATE.p12 file to convert to base64, you need to go back into the certificates page on XCode and export your distribution certificate to get the .p12 file:
You will also need to set a password for this file and specify it as P12_PASSWORD.
When you’re asked for the PROVISIONING_PROFILE.mobileprovision, it’s the provisioning profile that you generated as part of the previous steps we did.
Provided you set all the secrets correctly, under Settings for your repo > Secrets and variables > Actions, it should look something like this:
Now it’s time for our workflow. This workflow is for a fairly typical Capacitor app that is built with npm run build, but I encourage you to go through the file and adjust things such as XCode version and Node.js version to match your project. Save this file under .github/workflows/build-ios.yml
name: Build iOS

on:
  push:
    branches:
      - main
  workflow_dispatch:

jobs:
  build:
    runs-on: macos-13
    name: Build iOS app
    steps:
      - name: Checkout source
        uses: actions/checkout@v3

      - name: Install the Apple certificate and provisioning profile
        env:
          BUILD_CERTIFICATE_BASE64: ${{ secrets.BUILD_CERTIFICATE_BASE64 }}
          P12_PASSWORD: ${{ secrets.P12_PASSWORD }}
          BUILD_PROVISION_PROFILE_BASE64: ${{ secrets.BUILD_PROVISION_PROFILE_BASE64 }}
          KEYCHAIN_PASSWORD: ${{ secrets.KEYCHAIN_PASSWORD }}
        run: |
          # create variables
          CERTIFICATE_PATH=$RUNNER_TEMP/build_certificate.p12
          PP_PATH=$RUNNER_TEMP/build_pp.mobileprovision
          KEYCHAIN_PATH=$RUNNER_TEMP/app-signing.keychain-db

          # import certificate and provisioning profile from secrets
          echo -n "$BUILD_CERTIFICATE_BASE64" | base64 --decode -o $CERTIFICATE_PATH
          echo -n "$BUILD_PROVISION_PROFILE_BASE64" | base64 --decode -o $PP_PATH

          # create temporary keychain
          security create-keychain -p "$KEYCHAIN_PASSWORD" $KEYCHAIN_PATH
          security set-keychain-settings -lut 21600 $KEYCHAIN_PATH
          security unlock-keychain -p "$KEYCHAIN_PASSWORD" $KEYCHAIN_PATH

          # import certificate to keychain
          security import $CERTIFICATE_PATH -P "$P12_PASSWORD" -A -t cert -f pkcs12 -k $KEYCHAIN_PATH
          security list-keychain -d user -s $KEYCHAIN_PATH

          # apply provisioning profile
          mkdir -p ~/Library/MobileDevice/Provisioning\ Profiles
          cp $PP_PATH ~/Library/MobileDevice/Provisioning\ Profiles

      - name: Set up XCode
        uses: maxim-lobanov/setup-xcode@v1
        with:
          xcode-version: 14.3.1

      - name: Setup Node.js
        uses: actions/setup-node@v3
        with:
          node-version: 19.x

      - name: Install app dependencies
        run: npm install

      - name: Build project app
        run: npm run build

      - name: Capacitor update
        run: npx cap update

      - name: Capacitor copy
        run: npx cap copy

      - name: Build project
        run: xcodebuild -workspace './ios/App/App.xcworkspace' -scheme App -destination generic/platform=iOS -archivePath App.xcarchive archive

      - name: 🍻 Assemble IPA
        run: xcodebuild archive -archivePath App.xcarchive -exportArchive -exportOptionsPlist ./archive.plist -exportPath output -allowProvisioningUpdates

      - name: Upload release bundle
        uses: actions/upload-artifact@v3
        with:
          name: app-ios
          path: output/
          retention-days: 60

      # For use on self-hosted runners, see
      # https://docs.github.com/en/actions/deployment/deploying-xcode-applications/installing-an-apple-certificate-on-macos-runners-for-xcode-development
      #- name: Clean up keychain and provisioning profile
      #  if: ${{ always() }}
      #  run: |
      #    security delete-keychain $RUNNER_TEMP/app-signing.keychain-db
      #    rm ~/Library/MobileDevice/Provisioning\ Profiles/build_pp.mobileprovision
There is one more file we have to add called archive.plist, add this file to the root of your project:
<?xml version="1.0" encoding="UTF-8"?>
<!DOCTYPE plist PUBLIC "-//Apple//DTD PLIST 1.0//EN" "http://www.apple.com/DTDs/PropertyList-1.0.dtd">
<plist version="1.0">
<dict>
<key>method</key>
<string>app-store</string>
<key>provisioningProfiles</key>
<dict>
    <key>place.appreciation.jar</key>
    <string>Deploy GitHub</string>
</dict>
</dict>
</plist>
The thing you have to change in this file is to replace place.appreciation.jar with your app id, and replace Deploy GitHub with the name of your provisioning profile. I’m not sure why this manual step is required, but if you omit this and use the archive.plist file from the first step of the XCode build, it does not have the correct provisioningProfiles set so you will get the following error:
error: exportArchive: "App.app" requires a provisioning profile with the Associated Domains and Push Notifications features.

 Error Domain=IDEProvisioningErrorDomain Code=9 ""App.app" requires a provisioning profile with the Associated Domains and Push Notifications features." UserInfo={IDEDistributionIssueSeverity=3, NSLocalizedDescription="App.app" requires a provisioning profile with the Associated Domains and Push Notifications features., NSLocalizedRecoverySuggestion=Add a profile to the "provisioningProfiles" dictionary in your Export Options property list.}

** EXPORT FAILED **
Delivering the file in via the Transporter app
After your build finishes, you can click on the build under your project on GitHub > Actions and download the resulting artifact.
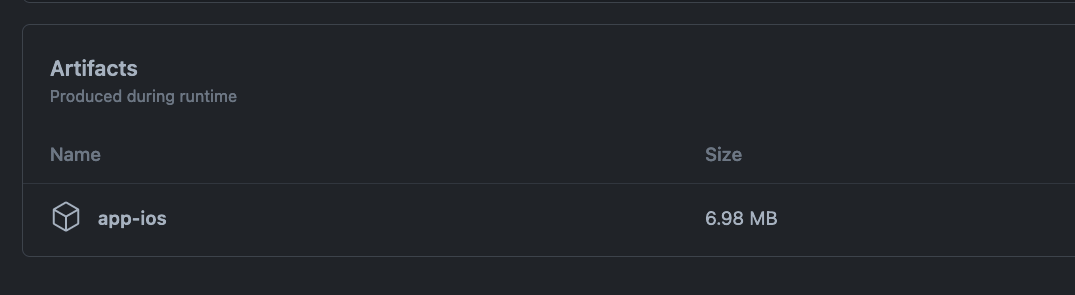
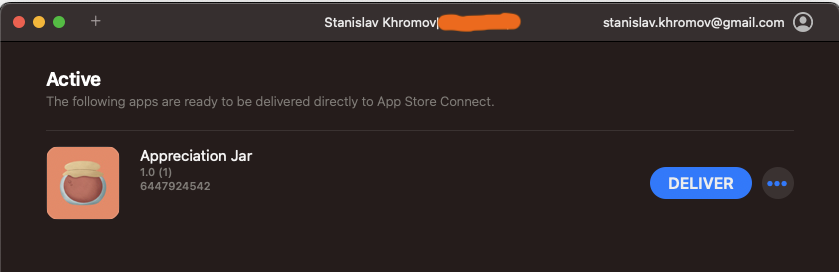
After you extract this zip file, you will have an App.ipa file. Drag this file to the Transporter app and press “Deliver” to send it to Apple.
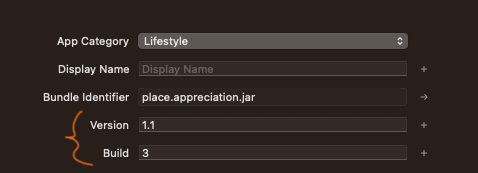
If you get an error that your build version has already been used, keep in mind you will have to update these manually in XCode via the General settings for your app:
Conclusion
Building your app using only GitHub Actions is possible, but it’s definitely not a straightforward process. There are tools such as Fastlane and of course XCode Cloud that simplifies this process, however my goal was a solution that was not dependent on third party libraries or services.
Good luck on your CI journey!
Photo by James Yarema on Unsplash
View Comments
Adding locally hosted Google fonts to your SvelteKit project
When you add fonts to your SvelteKit projects, you ideally want to do it in a...
 Steve
Steve
AuthorIn the “Assemble IPA” step, is the command correct? Does it actually need another `archive`?
 Stanislav Khromov
AuthorHi Steve! I’m not sure! Feel free to try to remove it and report back – if it works I’d be happy to update the post!
 Flávio
AuthorYou can upload the IPA file from the GitHub Action.
You need to create an app-specific password: https://support.apple.com/en-vn/102654
– name: Upload IPA to AppStore
env:
APPLEID_EMAIL: ${{ secrets.APPLEID_EMAIL }}
APPLEID_PASSWORD: ${{ secrets.APPLEID_PASSWORD }}
run: xcrun altool -allowProvisioningUpdates –upload-app –type ios –file ./output/App.ipa –username $APPLEID_EMAIL –password $APPLEID_PASSWORD
 Stanislav Khromov
AuthorThank you for sharing! 🌟